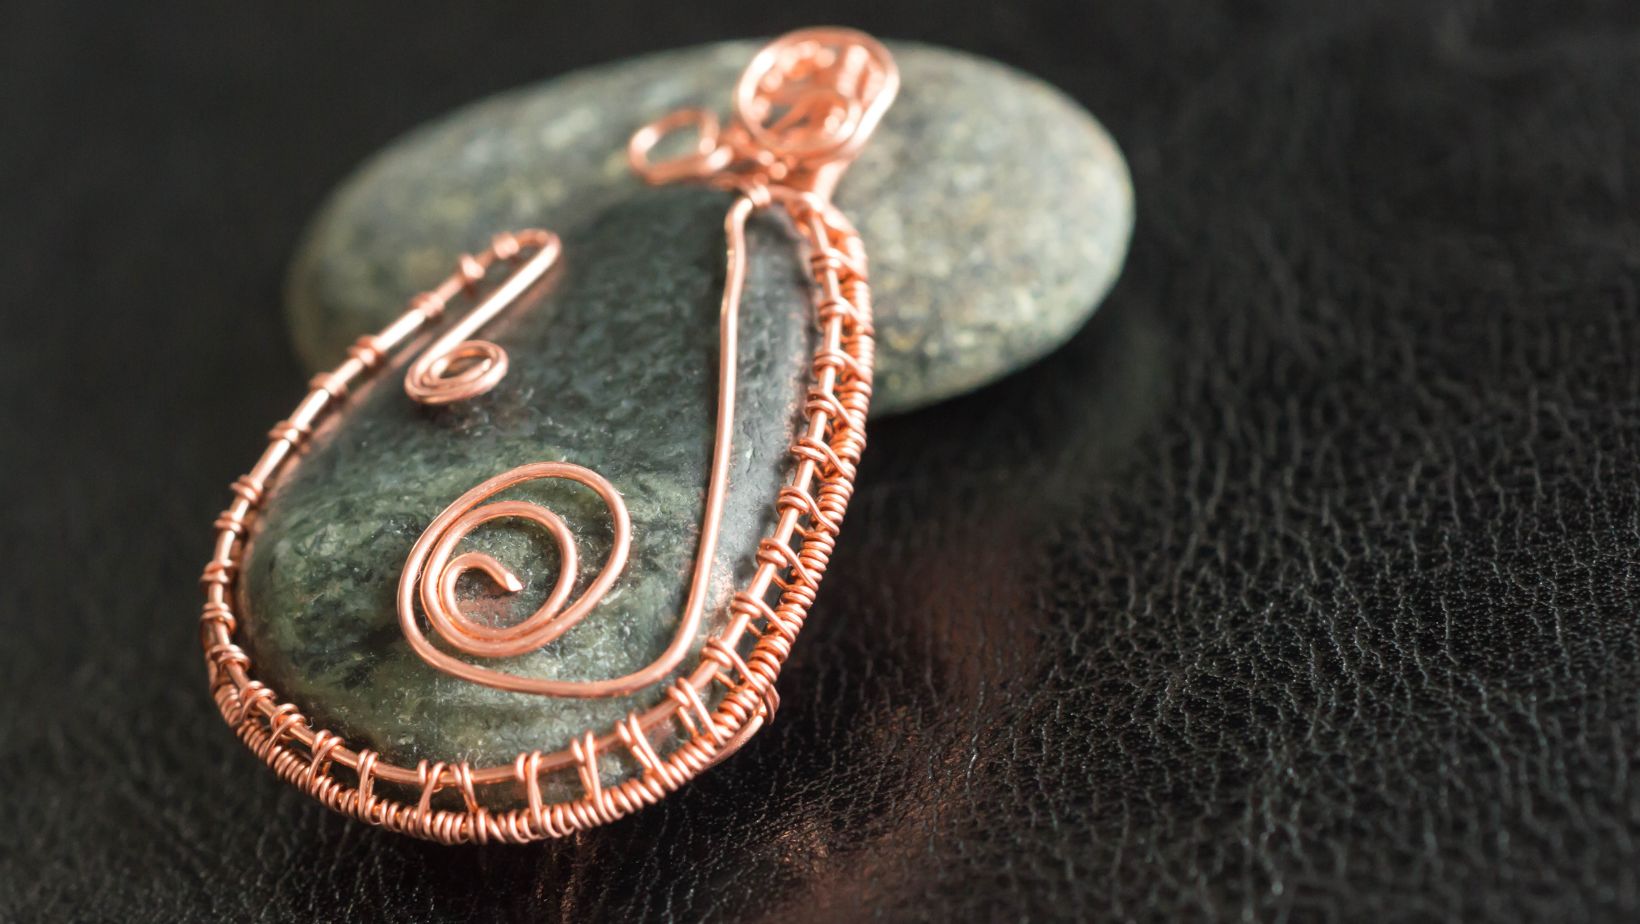
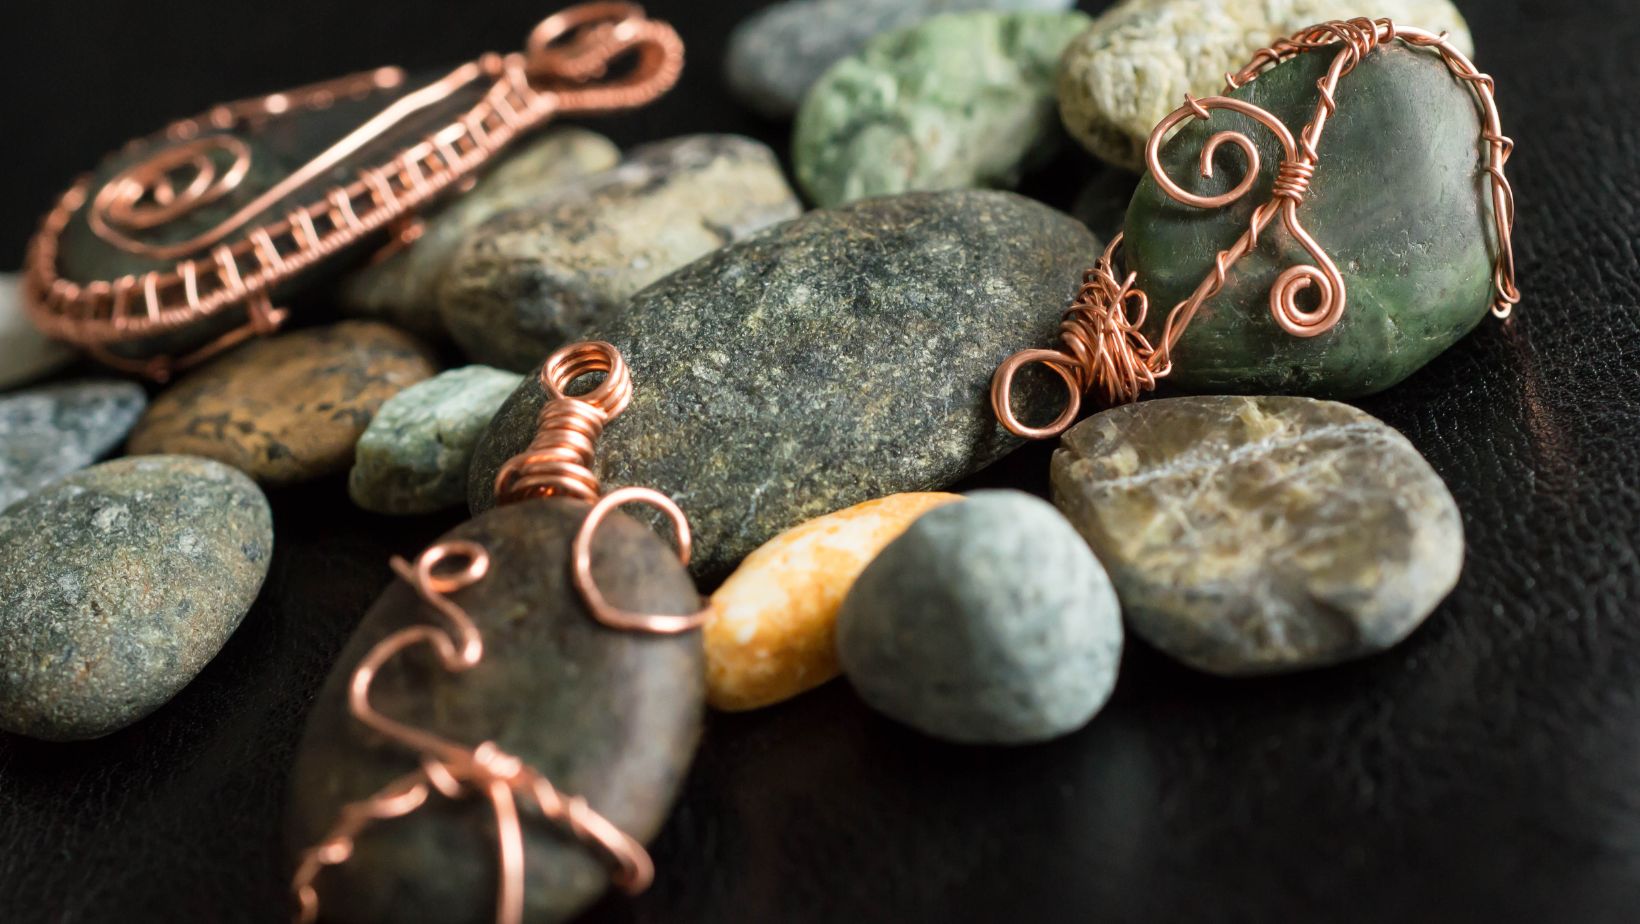
Wire wrapping is a jewelry making technique that involves wrapping wire around a bead or gemstone to create a pendant or charm. This technique is different from beading, where the beads are strung on wire or thread. Wire wrapping is usually done with round wire, but it can also be done with square or half-round wire. Wire wrapping is a relatively simple technique that can be learned by anyone with a bit of patience and practice. The most important thing to remember when learning how to wire wrap is to take your time and be patient with yourself. The results will be worth it!
Wire Wrapping Methods
There are many different ways to wire wrap beads, but we’ll start with the most basic method: the single loop wrap. This is the perfect place to start if you’re new to wire wrapping, as it only requires a few basic supplies and is easy to learn.
The Tools You Need
If you’re new to wire wrapping, you may be wondering what tools you need to get started. The good news is that you probably already have most of the supplies you need around your house. For basic wire wrapping, you will need:
Wire cutters: These are used to cut the wire to the desired length. You can use regular household scissors, but investing in a good pair of wire cutters will make your life much easier.
Round nose pliers: These pliers have round tips that are used to make loops in the wire.
Flat nose pliers: These pliers have flat tips that are used to grip the wire and bend it into shape.
Wire: You can use any type of wire for wire wrapping, but some types are better suited for beginners than others. Copper and silver-colored craft wire can be found at most craft stores and is relatively easy to work with. Gold-filled or sterling silver wire is a good choice for those who want to create higher-end jewelry.
Beads: You can use any type of beads for wire wrapping, but make sure they are small enough to fit on the wire. seed beads are a good choice for beginners.
With these tools, you will be able to create basic loops and wraps that can be used to create a variety of jewelry designs.
Different Types of Wire
Wire wrapping is a jewelry making technique that involves using thin wire to create intricate designs. The wire is wrapped around itself and other beads or components to create a variety of shapes and patterns.
There are many different types of wire that can be used for wire wrapping, including:
Copper – popular choice for wire wrapping because it is relatively inexpensive and easy to work with. It is also a very sturdy metal, so it can be used to create durable jewelry pieces.
Silver – classic metal that has been used in jewelry making for centuries. It is more expensive than copper, but it has a beautiful lustrous finish. Silver is also a very strong metal, so it is ideal for creating statement pieces of jewelry.
Gold – the most expensive metal that is commonly used for wire wrapping. It has a luxurious finish and it does not tarnish as quickly as silver. Gold is also a very strong metal, making it perfect for creating highly detailed wire wrap designs.
How to Wire Wrap Beads for Jewelry
Wire wrapping is a technique that is used to secure beads and other jewelry components together. It is a very strong and versatile method that can be used to create a variety of different jewelry designs. Wire wrapping is a great option for beginners because it is relatively easy to learn and does not require a lot of special tools or materials. In this tutorial, we will show you how to wire wrap beads for jewelry.
Supplies needed for wire wrapping:
- Beads (choose whatever size, shape and color you like!)
- Wire (I like to use 26 or 28 gauge silver plated craft wire)
- Wire cutters
- Round nose pliers
- Flat nose pliers
Instructions:
1. Start by stringing your beads onto the wire. I like to start with a 2 inch long piece of wire, but you can use whatever length you like. Just leave a little extra at the end so you can make a loop.
2. Once your beads are strung on the wire, it’s time to start wrapping! Take the end of the wire and make a small loop around one of the beads. Then, continue wrapping the wire around the bead until you’ve made 3 or 4 wraps.
3. Now it’s time to finish off the wraps and secure them in place. Take the end of the wire and make a small loop around the base of the wraps (right where they meet the bead). Then, take your flat nose pliers and squeeze the loop closed so it’s nice and tight against the wraps. Finally, snip off any excess wire with your wire cutters and voila! You’ve successfully wrapped your first bead!
4. To finish off your jewelry piece, simply continue adding more wrapped beads until you have the desired length and then attach a clasp (I like using lobster clasps). And that’s it! You’ve now learned how to wire wrap beads for beautiful DIY jewelry
Advanced Wire Wrapping Techniques
Wire wrapping is a great way to add beads to your jewelry without having to use clasps or other fasteners. It can also give your jewelry a more organic look. Wire wrapping can be done with a variety of different techniques. In this section, we’ll cover some of the more advanced wire wrapping techniques.
Wrapping Beads With Multiple Wires
One way to create more interest in your wire wrapped jewelry is to use multiple wires in your design. This can be as simple as adding a second wire to wrap around the main wire, or you can get more creative and use multiple wires in a spiral design. You can also use different colored wires to create contrast or add additional beads between the wires for more interest.
When you are working with multiple wires, it is important to keep them organized so that you don’t get tangled up. You can use small pieces of tape to secure the wires in place while you are working. Another option is to use a special jig or board that has holes for the wires so that you can keep them in place while you are working.
Once you have the basic technique down, there are endless possibilities for creating unique and interesting jewelry designs using multiple wires. experiment with different wire colors and sizes, and don’t be afraid to try new techniques.
Creating Wire Wrapped Loops
One of the most important findings in wire jewelry making is learning how to make a well-formed loop. A well-formed loop will lay flat against the piece it is attaching to (whether that be another wire, metal finding, or gemstone) and will not be able to twist out of shape easily. This type of loop is also less likely to come undone over time.
There are a few different ways that you can create a loop in your wire, but the two most common methods are using round nose pliers or chain nose pliers.
To create a loop using round nose pliers, start by holding the end of your wire at the very tip of the pliers (nearest to the joint). Slowly begin to wrap the wire around the pliers until you have made one complete revolution. Once you have made one revolution, hold onto the end of the wire with your fingers and remove the entire bundle from the pliers.
Now you will need to adjust the shape of your loop by gently squeezing it together until it is tight and secure, then opening it up slightly so that there is room for your bead or charm. Once you are happy with the size and shape of your loop, use your round nose pliers (or chain nose pliers) to grip onto the base of the loop near where it meets the rest of your wire. From here, twist your wrist until the wire has made one complete revolution around itself – this helps to secure everything in place and stops your charm from slipping out later on.
There are many other ways that you can finish off your loops (using different tools or techniques), but this is a great method for beginners to get started with!
Troubleshooting
If you’re new to wire wrapping or having trouble with your techniques, here are some tips to help you get started. Don’t worry, everyone makes mistakes at first. With a little practice, you’ll be wire wrapping like a pro in no time.
Common Problems and How to Fix Them
If you’re just getting started with wire wrapping, it’s inevitable that you’ll run into some problems. Here are some of the most common problems people have, along with how to fix them.
- The wire is too springy and won’t stay in place: This is usually because the wire is too thin. Try using a thicker gauge wire.
- The wire isn’t long enough: You can try using a longer piece of wire, or you can make a loop at the end of the wire to make it longer.
- The loops are too big or too small: This is usually because the wire is too thin or too thick. Try using a different gauge wire. If that doesn’t work, try adjusting the size of the mandrel (the tool you use to wrap the wire around).
- The loops are crooked: This is usually because the wire isn’t wrapped tight enough around the mandrel. Try wrapping it tighter, or using a thinner gauge wire.
- The beads keep falling off: This is usually because the loops are too big or the wire isn’t wrapped tight enough. Try using a thinner gauge wire and wrapping it tighter around the beads.